本文主要内容来自:https://tauri.app/v1/guides/distribution/updater。不保证时效性,但是可做参考。
Lettura 已经发了三个预览版本了,目前基础功能已经差不多了。在发布正式版本之前,将升级提示的能力补充上。Tauri 在升级提示这块做了一些封装,整体来说还是相对比较简单的。
版本更新的机制
在tauri.conf.json 中增加 updater 配置。
"updater": {
    "active": true,
    "endpoints": [
        "https://releases.myapp.com/{{target}}/{{current_version}}"
    ],
    "dialog": true,
    "pubkey": "YOUR_UPDATER_SIGNATURE_PUBKEY_HERE"
}| key | type | description |
|---|---|---|
| active | Boolean | 必填项。是否开启更新检查,默认 false |
| endpoint | Array | 必填项。更新检查的版本地址,按照顺序检查,直到最后一个地址。字符串 {{target}} 和 {{current_version}} 会在 URL 中自动替换。 |
| dialog | Boolean | 可选项。默认true。开启之后,当更新执行时,Tauri 的事件会被关闭掉。如果想在更新时自定义事件,必须设置为false。 |
| pubkey | String | 必填项。一个使用Tauri CLI创建的可用的公钥。 |
然后要准备好服务端的支持,以告知Tauri是否需要更新。在服务端侧,返回的JSON数据有两种格式。第一种返回如下的JSON:
{
  "url": "https://mycompany.example.com/myapp/releases/myrelease.tar.gz",
  "version": "0.0.1",
  "notes": "Theses are some release notes",
  "pub_date": "2020-09-18T12:29:53+01:00",
  "signature": ""
}
适合 endpoint 包含 {{target}} 和 {{current_version}} 的情况,比如:https://releases.myapp.com/{{target}}/{{current_version}}。Tauri 会根据用户当前的操作系统替换target,使用当前的App 版本替换current_version。在这里看到其具体的实现。
第二种则包含了更多平台信息,适合endpoints是固定URL的情况。Tauri 会检查 version 字段,如果正在运行的APP的 version 小于返回的version,那么触发一个更新。你可以把信息保存在JSON文件中,托管在一些静态服务上,比如这里是Lettura项目的更新文件。
{
  "version": "v1.0.0",
  "notes": "Test version",
  "pub_date": "2020-06-22T19:25:57Z",
  "platforms": {
    "darwin-x86_64": {
      "signature": "",
      "url": "https://github.com/lemarier/tauri-test/releases/download/v1.0.0/app.app.tar.gz"
    },
    "darwin-aarch64": {
      "signature": "",
      "url": "https://github.com/lemarier/tauri-test/releases/download/v1.0.0/silicon/app.app.tar.gz"
    },
    "linux-x86_64": {
      "signature": "",
      "url": "https://github.com/lemarier/tauri-test/releases/download/v1.0.0/app.AppImage.tar.gz"
    },
    "windows-x86_64": {
      "signature": "",
      "url": "https://github.com/lemarier/tauri-test/releases/download/v1.0.0/app.x64.msi.zip"
    }
  }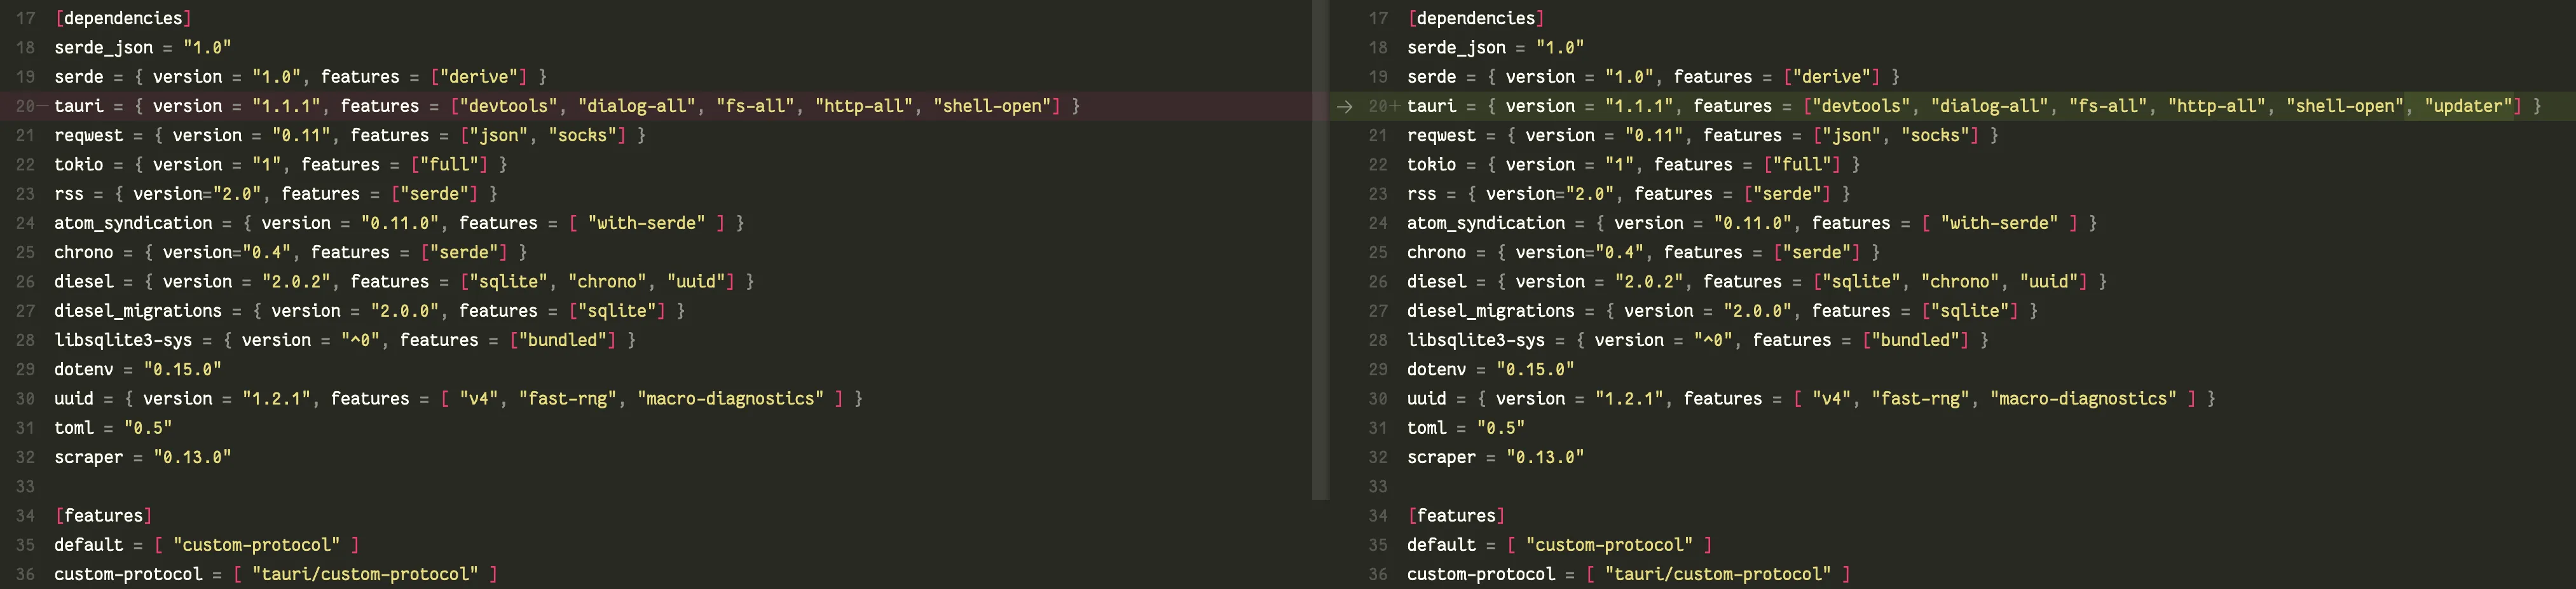
}当你在tauri.conf.json 中增加 update 相关的配置时,Tauri 启动时会自动更新 Cargo.toml 的配置。不得不说,Tauri在开发者体验这块做的真不错。
另外,当你开启了update设置之后, Tauri 在每次构建时会按照操作系统,构建出更新使用的产物,输出约定的目录结构。
macOS
target/release/bundle
└── macos
    └── app.app
    └── app.app.tar.gz (update bundle)
    └── app.app.tar.gz.sig
Windows
target/release/bundle
└── macos
    └── app.app
    └── app.app.tar.gz (update bundle)
    └── app.app.tar.gz.sig
Linux
target/release/bundle
└── appimage
    └── app.AppImage
    └── app.AppImage.tar.gz (update bundle)
    └── app.AppImage.tar.gz.sig
创建更新的签名
为了确保应用更新能够安全的被安装,Tauri提供了一个内置的签名。对更新进行签名,需要做两件事情:
- 将公钥添加到
tauri.conf.json,应用更新被在安装之前将会进行验证。 - 使用私钥对更新进行签名。
私钥必须保存好。每次发布更新都需要使用私钥。如果私钥丢失或者修改了,用户将无法顺利更新应用。用户只有一种选择,那就是下载最新的安装包,重新安装应用。
使用Tauri提供的命令创建好key之后,记得保存好。
tauri signer generate -w ~/.tauri/lettura.key
Generating new private key without password.
Please enter a password to protect the secret key.
Password:
Password (one more time):
Deriving a key from the password in order to encrypt the secret key... done
Your keypair was generated successfully
Private: /Users/zhanglun/.tauri/lettura.key (Keep it secret!)
Public: /Users/zhanglun/.tauri/lettura.key.pub
---------------------------
Environment variables used to sign:
`TAURI_PRIVATE_KEY` Path or String of your private key
`TAURI_KEY_PASSWORD` Your private key password (optional)
ATTENTION: If you lose your private key OR password, you'll not be able to sign your update package and updates will not work.
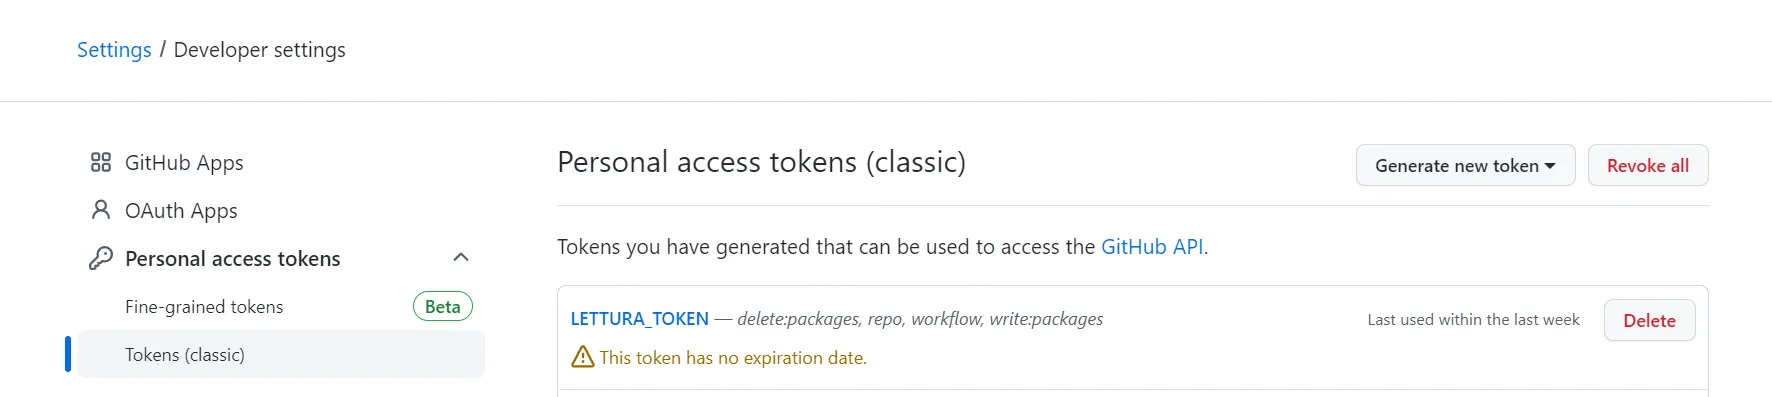
---------------------------在 https://github.com/settings/tokens 添加 Github Action 需要使用的 token,以允许workflow运行时有权限访问仓库。
- 访问 https://github.com/settings/tokens,创建新的 token。
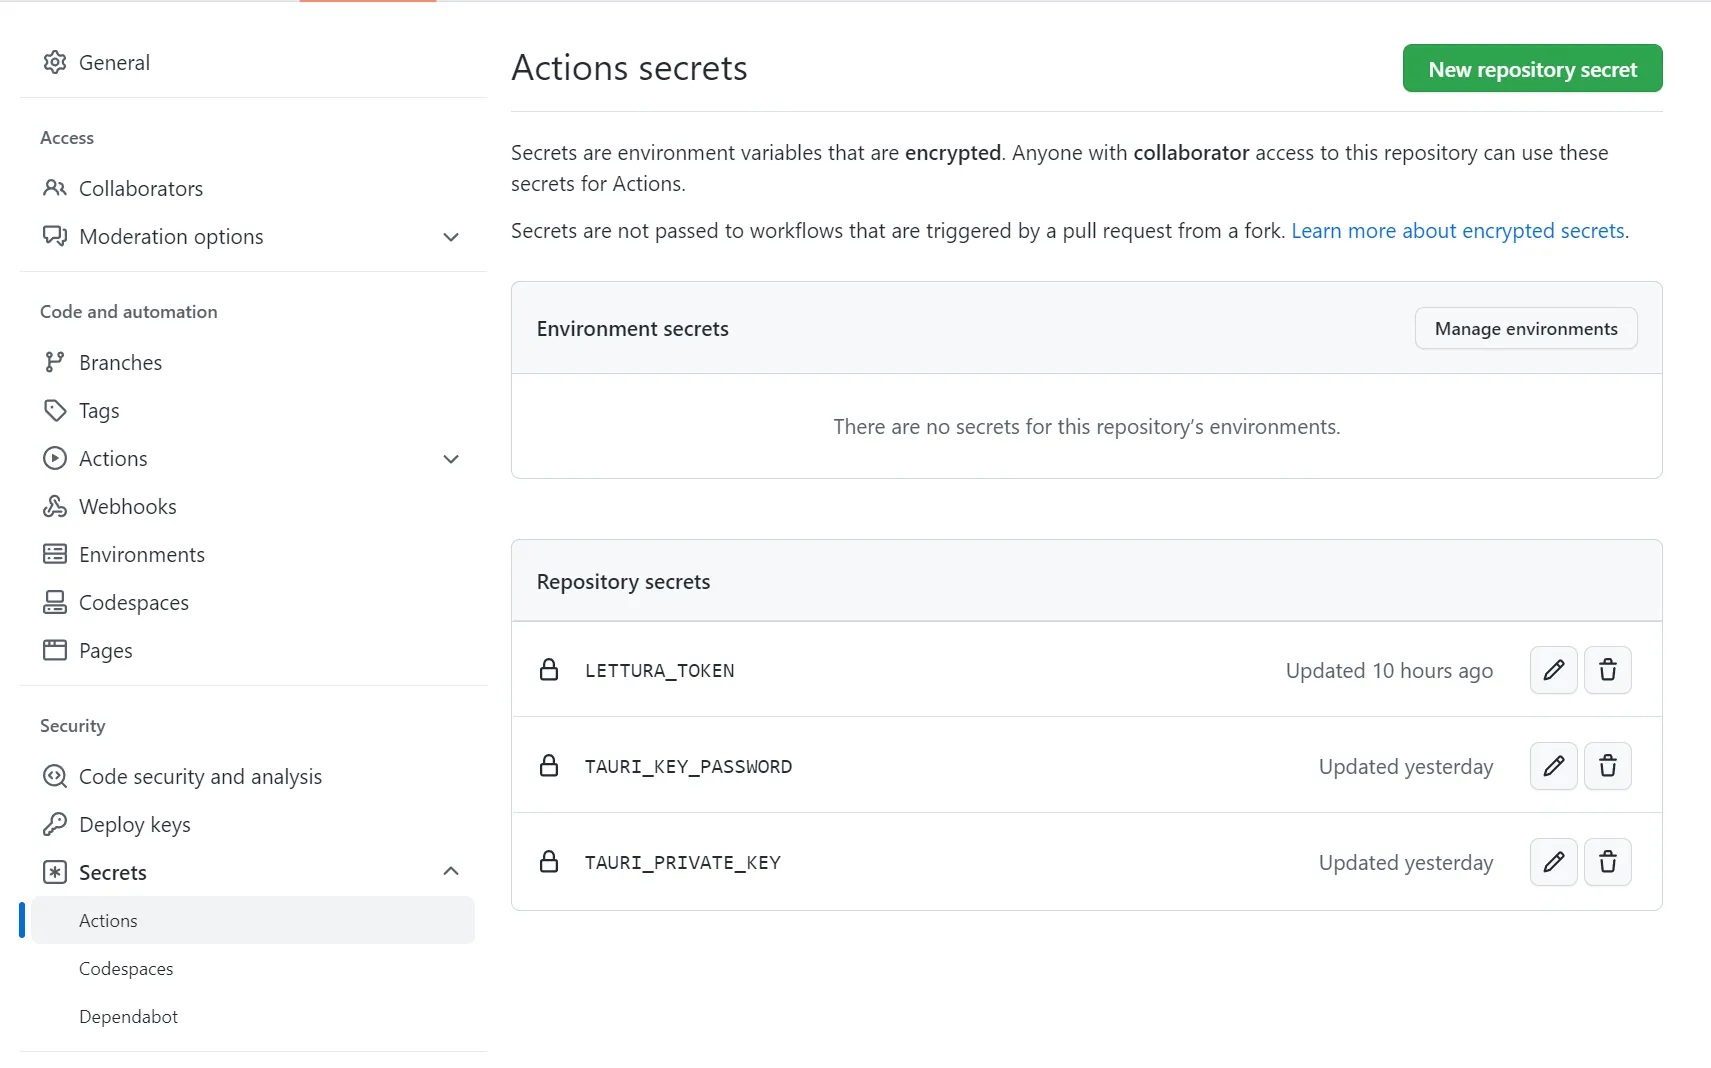
- 访问 仓库的设置页面, 将 token 保存到 Actions secrets 中
配置Github Action
为了方便操作,我将 TAURI_KEY_PASSWORD 和 TAURI_PRIVATE_KEY 也一并保存在secrets中。然后按照官方的教程 增加 workflow 配置:
name: 'Publish'
on:
  push:
    branches:
      - release
env:
  TAURI_PRIVATE_KEY: ${{ secrets.TAURI_PRIVATE_KEY }}
  TAURI_KEY_PASSWORD: ${{ secrets.TAURI_KEY_PASSWORD }}

jobs:
  release:
    strategy:
      fail-fast: false
      matrix:
        platform: [macos-latest, ubuntu-20.04, windows-latest]
    runs-on: ${{ matrix.platform }}
    steps:
      - name: Checkout repository
        uses: actions/checkout@v3

      - name: Install dependencies (ubuntu only)
        if: matrix.platform == 'ubuntu-20.04'
        # You can remove libayatana-appindicator3-dev if you don't use the system tray feature.
        run: |
          sudo apt-get update
          sudo apt-get install -y libgtk-3-dev libwebkit2gtk-4.0-dev libayatana-appindicator3-dev librsvg2-dev

      - name: Rust setup
        uses: dtolnay/rust-toolchain@stable

      - name: Rust cache
        uses: swatinem/rust-cache@v2
        with:
          workspaces: './src-tauri -> target'

      - name: Sync Pnpm version
        uses: pnpm/action-setup@v2
        with:
          version: 6.32.9
      - name: Sync node version and setup cache
        uses: actions/setup-node@v3
        with:
          node-version: 'lts/*'
          cache: 'pnpm'

      - name: Install app dependencies and build web
        # Remove `&& yarn build` if you build your frontend in `beforeBuildCommand`
        run: pnpm install

      - name: Build the app
        uses: tauri-apps/tauri-action@v0
        env:
          GITHUB_TOKEN: ${{ secrets.LETTURA_TOKEN }}
        with:
          tagName: 'v__VERSION__' # This only works if your workflow triggers on new tags.
          releaseName: 'Lettura v__VERSION__' # tauri-action replaces \_\_VERSION\_\_ with the app version.
          releaseBody: 'See the assets to download and install this version.'
          releaseDraft: false
          prerelease: true
每当 release 分支推送新代码,就会触发 Tauri 的版本构建和发布过程。
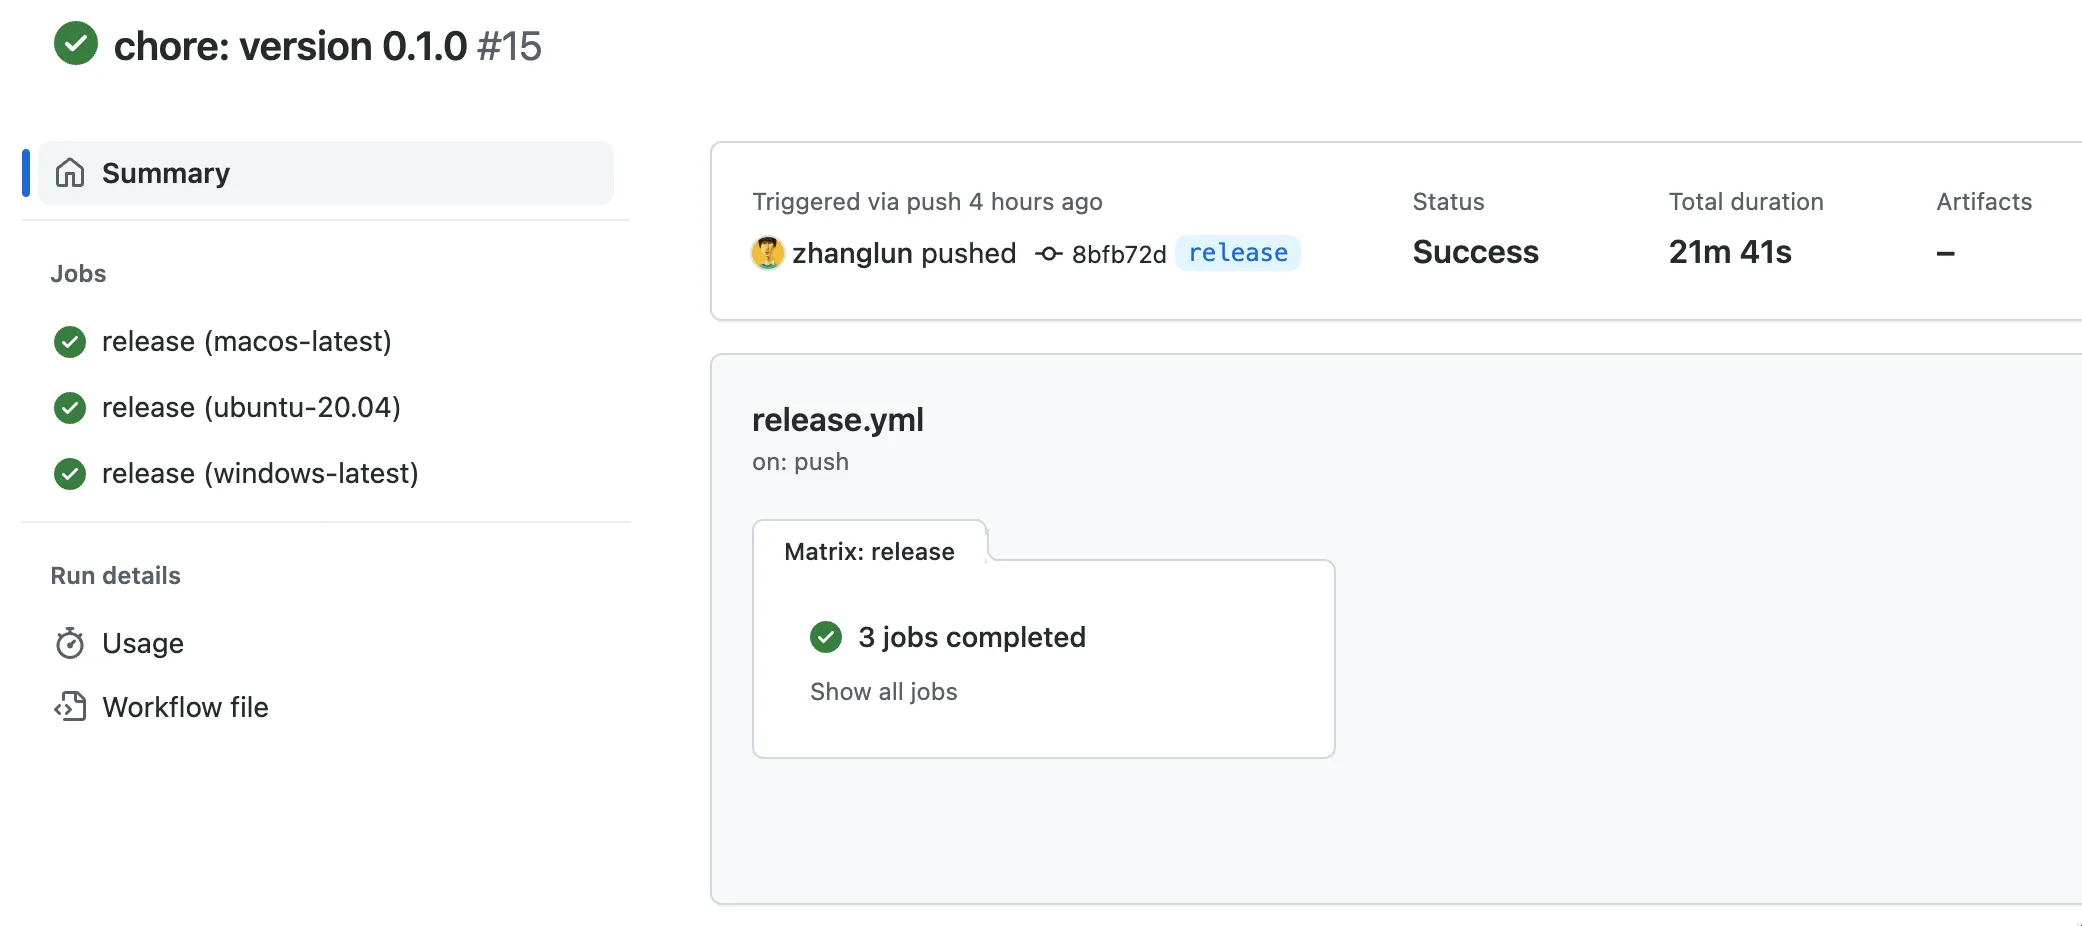
如果一切顺利的话,在Release页面可以看到自动创建的release记录。

更新版本信息
现在构建发布的流程已经完成了,接下来需要想办法拿到更新信息,保存到JSON中,以更新到gist。翻了Tauri Action的一些issuse,找到了相关内容。社区讨论过关于在Action中支持生成updater JSON的话题 https://github.com/tauri-apps/tauri-action/pull/287,使用dev版本的Action可以在最后release之后创建lastest.json文件,随同产物一起发布。

这里有一个可以参考的案例: https://github.com/Layendan/NineAnimator-Tauri/blob/master/.github/workflows/publish.yml。不过考虑到这个能力的几个问题:
- 没出现在官方文档,可以认为是不稳定的,不推荐的。
- 输出latest.json,但是没有更新到gist的能力。
- 更新到gist的能力算是我的私人订制,自己实现更合适
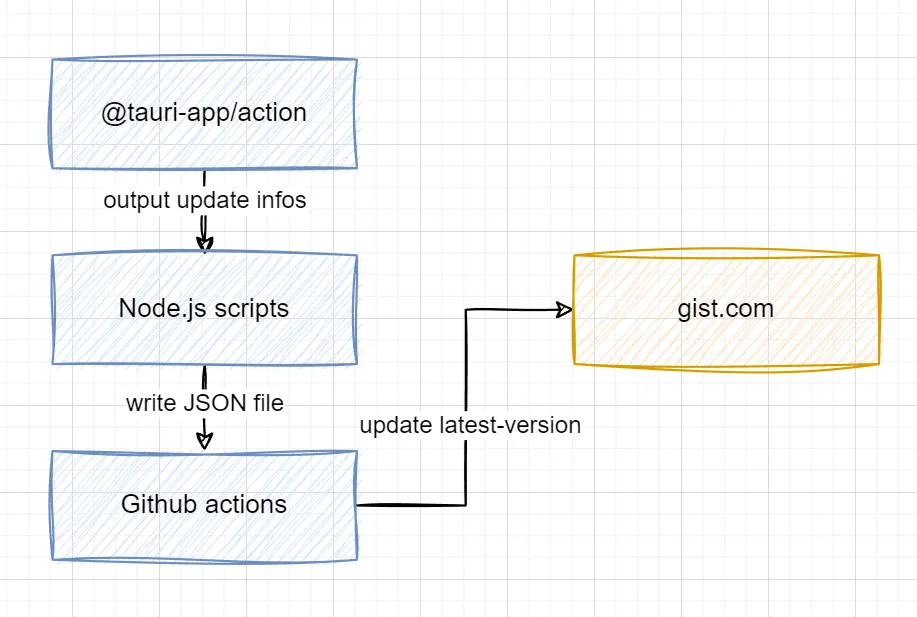
最后决定自己实现创建JSON内容和更新gist的能力。基本的思路如下图所示:
2023-04-25更新:
社区推荐使用tauri-app/tauri-aciton@dev创建 latest.json https://github.com/tauri-apps/tauri/discussions/6385